How to Draw an Easy Eye Step by Step
There are many, many different types of eyes to draw.
Thus, there is no single eye tutorial that can show you how to draw the infinite types of eyes in this world.
Every little detail, every little difference is what makes each of our eyes unique to our own physical identity.
However, I hope that you can find some basic tips from this tutorial so that you can learn the basic knowledge of sketching an eye and carry it over to whatever type of eye you want to draw in the future.
Also, I wanted to disclose that I have not been professionally taught to draw and have not gone to an art school to learn how to draw. My anatomy is definitely not perfect, so I hope you can keep that in mind.
Learn from many people – that is how you truly master a skill.
How to Draw a Realistic Eye: Step by Step

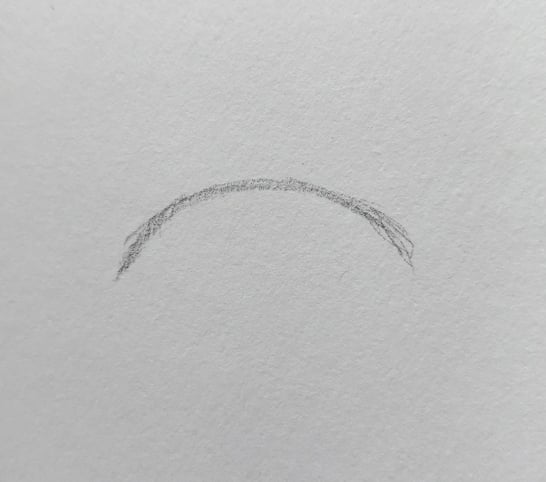
Step 1: Draw the upper lid. The shape will change according to the individual eye, but a regular curve will do for this example.

Step 2: Draw the tear duct. This is the inner corner of one's eye that dips downwards.

Step 3: Draw the lower lid.

Step 4: Draw the iris, the part of the eye that determines one's eye color.
I'd recommend studying your own iris or a closeup photo of other people's eyes.
The outer edge of the iris is darker so you can emphasize that in your sketch.
The size of the iris depends on what facial expression is being made, but for a neutral look, the top and bottom lids should cover some of the circle of the iris.

Step 5: Draw the pupil, the dark center-most part of one's eye.
I also drew the spot where I determined the light to hit the iris. I will keep this area white by erasing whenever I shade into this area.

Step 6: Shade in the color of the iris.
I like to create lines going from the pupil to the outer edge of the iris all the way around. Make sure not to shade into the area where the light hits the eye.

Step 7: Add more shade to the iris.

Step 8: Shade in the area around the tear duct to create the round look of an eyeball.
I also shaded under the upper lid to emphasize the spherical shape of one's eye.

Step 9: Draw eyelashes by flicking your pencil upwards in a curve. Make each individual eyelash a little different, as some eyelashes are shorter than others.

Step 10: Finish drawing eyelashes.

Step 11: Draw the waterline. This is a line of skin between the lashes and the eye on the lower lid.

Step 12: Draw the lower lashes. Use short, light strokes.

Step 13: Draw the crease (depending on whether your subject has one). I also darkened the pupil.

Step 14: Add a few finishing touches to add more dimension… And you are done!
Now, you know all the steps to draw a realistic eye all on your own!

Things to Remember About Drawing:
Sketch lightly and repeatedly! Don't press down hard with the pencil.
Very rarely can someone draw their first line perfectly in one go. Make faint, short lines repeatedly to sketch out the shape you want.
When you have the line sketched out that you want to keep, make it a little darker and erase the mistake lines.
It's perfectly okay to make many, many drawings that don't meet up to your expectations.
In fact, that to me is a good sign that your mind is able to discern your own art objectively: To see your own mistakes and know in your mind, what kind of art you want to achieve.
Don't be too hard on yourself though. With practice, your art will get better and better, so just enjoy where you're at now and just love drawing for its process.
Eye Drawings to Practice
Here is a collection of eye drawings from different artists.
I have included their social media pages below each photo, so please check out more of their work and support them!

I know this one's not fully realistic, but in many ways, it is… at least in my opinion 😉
I hope this blog post was helpful to you and that you now know what it takes to draw a realistic eye on your own!
I hope you have a wonderful day or night wherever you are – And have fun honing your drawing skills!
sullivanrectelon1981.blogspot.com
Source: https://www.shihoriobata.com/blog/how-to-draw-eyes/
0 Response to "How to Draw an Easy Eye Step by Step"
Post a Comment